Deep Learning Rig Build-out
I decided to build a deep learning / LLM rig. I have been able to get by training and running inference on smaller models on my RTX 2070 GPU from my desktop I built in 2020 (pandemic project) and occasionally renting server time on AWS. AWS is not the most cost efficient, but my needs have been fairly minimal. However I have had the LLM bug for a while and have wanted an excuse for a while to build a dedicated system for deep learning.
I am an advocate for self hosting - I manage my personal data on a NAS (network attached storage), run various applications on my home server such as jellyfin for home media, and use Raspberry pi’s for tasks like managing my home irrigation system with OpenSprinkler. So the thought of hosting and tweaking my own LLM is very tempting. I have been lurking the LocalLlama subreddit and learned what I can build at different budget levels. I want to be able to run small-medium size models (13 billion parameters) at “decent” speeds and perform fine-tuning (likely will need a second GPU for fine-tuning tasks).
A single RTX 3090 GPU has 24 GB of VRAM and should be sufficient enough for that size (the rule of thumb is roughly 1 billion parameters requires 1 GB of VRAM, at the right quantization level). Fine-tuning with LORA will be pushing it, but since I am using this machine purely as a headless LLM-server, I may be able to after installing a second GPU with equivalent memory. Hence the rest of the computer is built with the ability to integrate a second GPU.
The Hardware
I managed to keep the total cost under my $2,000 target budget. Some parts were acquired second-hand, particularly components I felt some confidence being able to visually assess, shaving a few hundred dollars. My parts list is here, although I do have 2 RTX 3090’s listed to ensure compatibility.
Used RTX 3090’s are abundant and are typically in the $600-$900 range. I found a local videographer who purchased one brand new, didn’t need it (he needed to upgrade his CPU to achieve faster rendering), and was able to meet in person. I paid $800, which is on the higher end of the secondary market but was happy to pay a little extra for a unit barely touched.
I had spare parts including extra case fans, CPU heat sink, and hardware from my previous builds that I was able to source from to save money as well. I decided to build a “traditional” desktop vs. a server-style or a more custom build, mainly due to costs and familiarity.
Below is the breakdown of my build-out cost.
| Component | Product | Price | Used |
|---|---|---|---|
| GPU | EVGA GeForce RTX 3090 | $800 | |
| CPU | AMD Ryzen 5900X | $295 | |
| CPU heatsink | Stock AMD heatsink | $free | |
| Motherboard | ASUS ROG Crosshair VIII Hero WiFi | $220 | |
| RAM | G.Skill Ripjaws V 64 GB (2 x 32 GB) DDR4-3600 | $134 | |
| Storage (SSD) | Samsung 990 Pro 1 TB PCIe 4.0 NVMe M.2 | $100 | |
| Storage (HDD) | Western Digital Blue 3.5 TB 5400 RPM | $73 | |
| Power Supply | Super Flower Leadex Platinum SE 1200W 80+ Platinum | $160 | |
| Case | Phanteks Enthoo Pro ATX | $30 | |
| Case fans | Phanteks and Fractal stock fans | $free | |
| GPU brace | upHere Graphics Card GPU Brace | $10 |
TOTAL = $1,822
Factors that went into my hardware choices:
- Intel chips are generally considered a little more reliable, but I have had good luck with AMD on my other builds and the heavy lifting will be performed by the GPU. I saved a few hundred dollars by going with a prior generation AMD card, but still wanted at least 12 cores. Most (all?) AMD chips no longer come with heat sinks but I have purchased 3XXX AMD CPUs that did include a heat sink, and replaced it with a quieter one. Since this is not in my office, the slightly louder stock heat sink will do.
- 2 x16 PCIE slots that will fit 2 3090 GPUs. Higher-end mobo’s come with full x16 support on more than one slot and will utilize the CPU rather than being bottlenecked by the chipset. The motherboard I chose has a x16 and x8 slot. The second slot is the correct size, however only half of the slots are actually wired. Also the first will only be able to use 8 slots when 2 GPU’s are installed due to the CPU (a much more expensive Threadripper would not have this limitation). Most tests have shown that the difference between 8 and 16 slots in almost negligible. The difference in performance should be less than 5% according to this benchmark.
- I keep my programs on my SSD and data on my HDD to save money since I/O on the data files is not as much of a bottleneck. During heavy data usage, I have plenty of space to cache data on the SSD as needed.
- 1200 watt power supply is way more than I need but will be necessary when adding a second GPU.
- I went with a very large case that should be compatible with a second 3090, although I likely will have to figure out how to vertically mount it for temperature regulation.
- I need a WiFi-capable motherboard since my whole house does not have ethernet and will be keeping the rig in my basement. The machine runs headless, so I do not have any peripherals attached. WiFi does slow downloading large models, but I’d rather have to wait a little longer than listen to it humming in my office.
- I am monitoring temperatures and hope the extra fans and good airflow will allow me to get away without a water cooler.
- I added a GPU brace to help minimize GPU sag.
The only part of the build that gave me issues was figuring out how to support the GPU. They have grown massive at the upper-end of the consumer side; motherboards and cases have not been designed to handle such a large component.
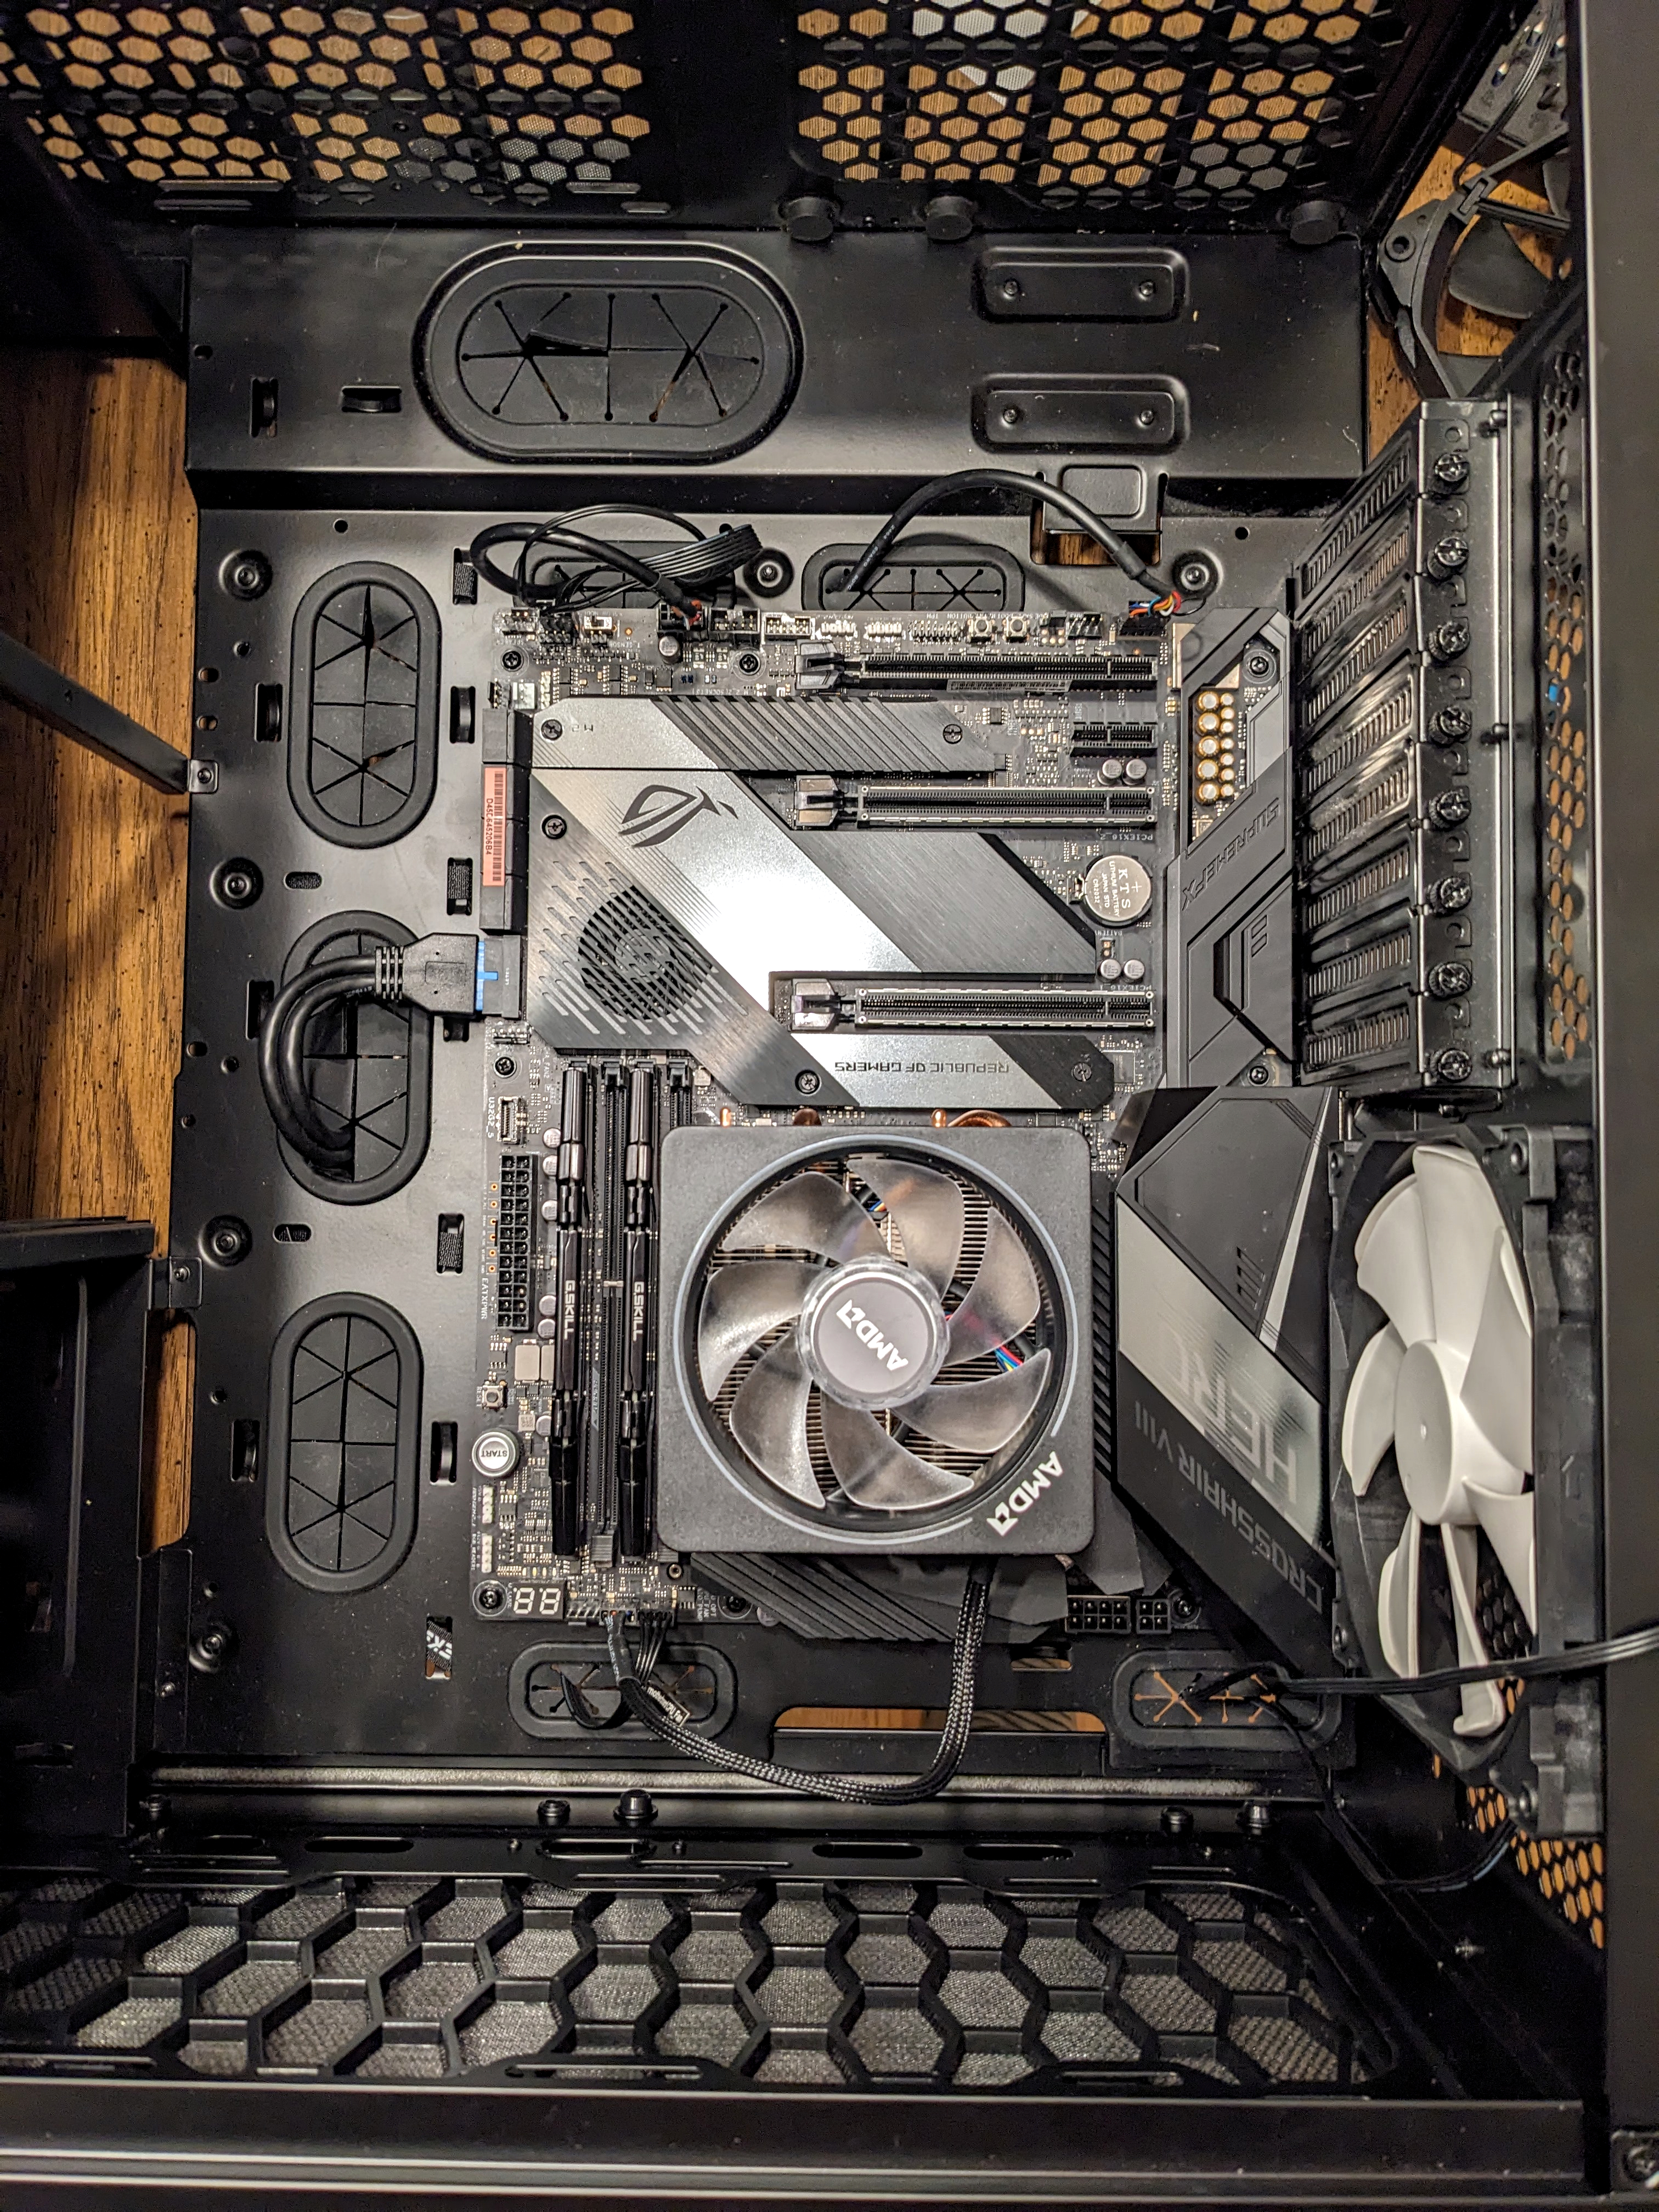
Here is a photo of the case just after connecting the motherboard with the CPU, before installing the GPU.
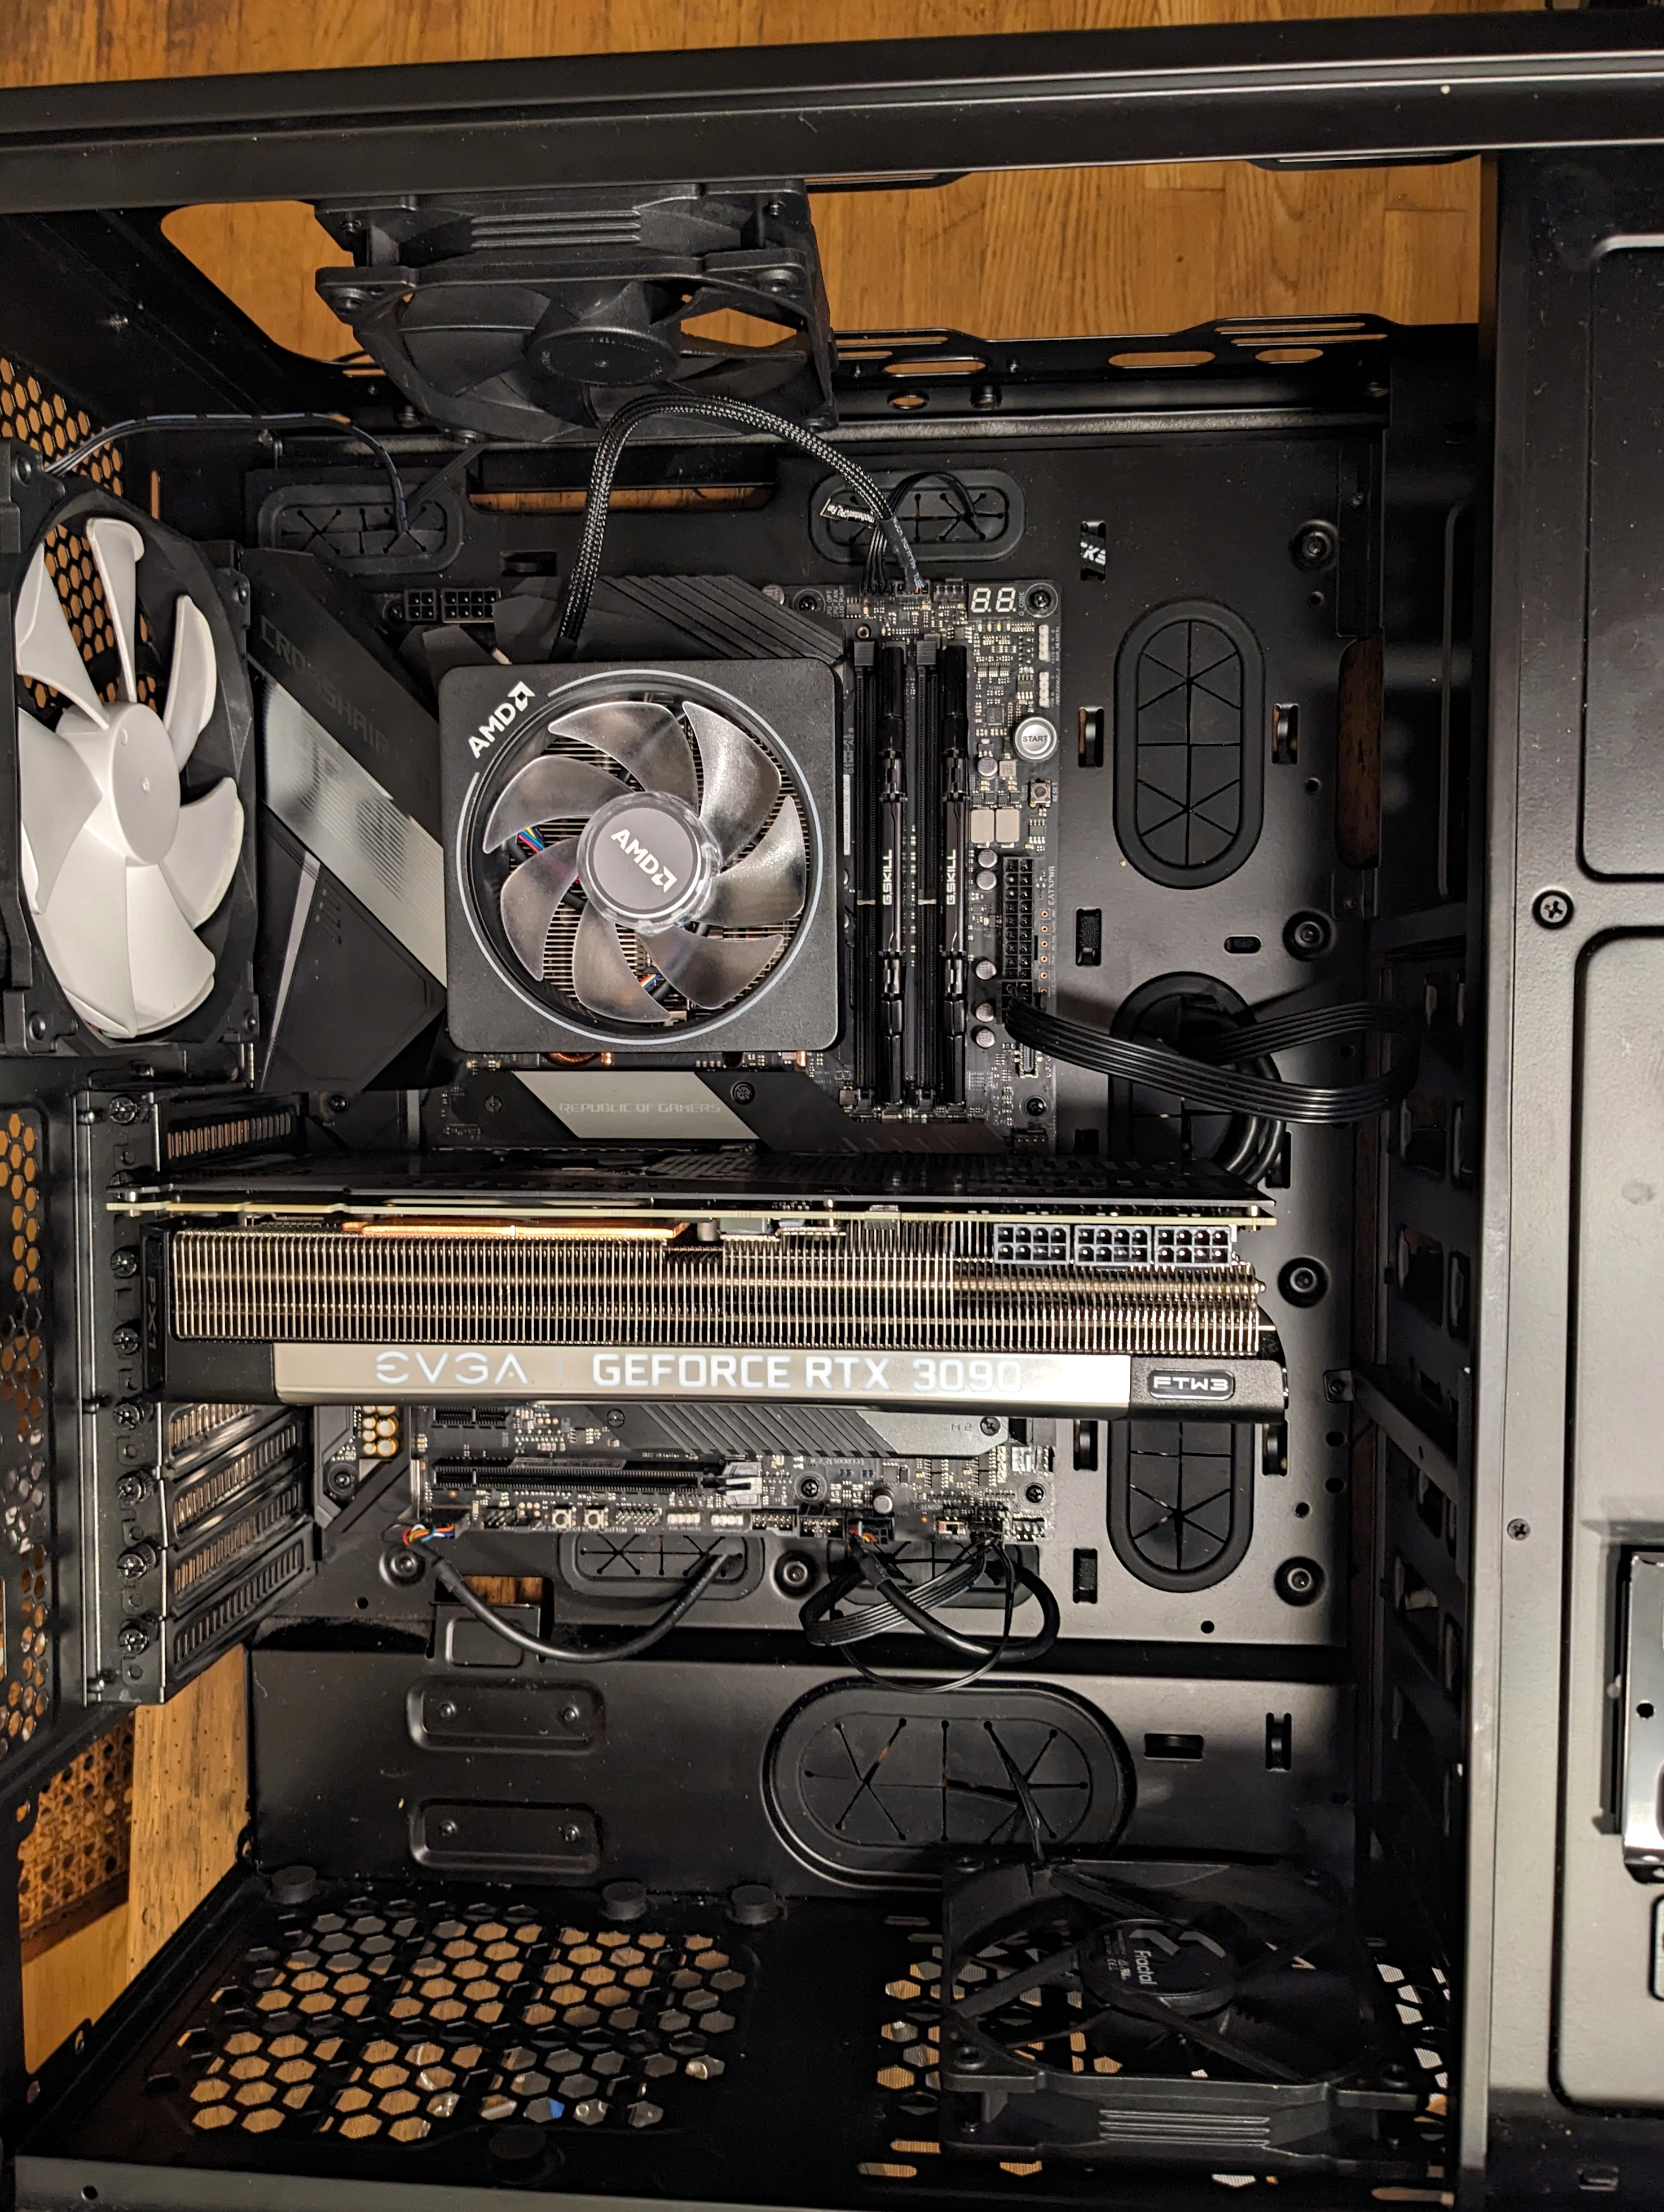
And here is a photo after installing the GPU. Notice how about \(\frac{1}{3}\) of the GPU sticks out to the right. This puts a strain on the GPU’s PCIe connector which is located on the left. All of the weight is then supported by the connector and a couple of screws also on the left side of the case, which causes some sag. I am far from an expert, but the sag concerns me, so I found a solution by installing a bracket (the case is laying on its side in the photo, so the sag is not visible here).
Here is a picture after installing a bracket I bought from Amazon. Unfortunately the bracket was not a great fit either, as the GPU (protected by a piece of rubber) sat on the bracket in an awkward spot, which could have slipped easily and damaged the fans.
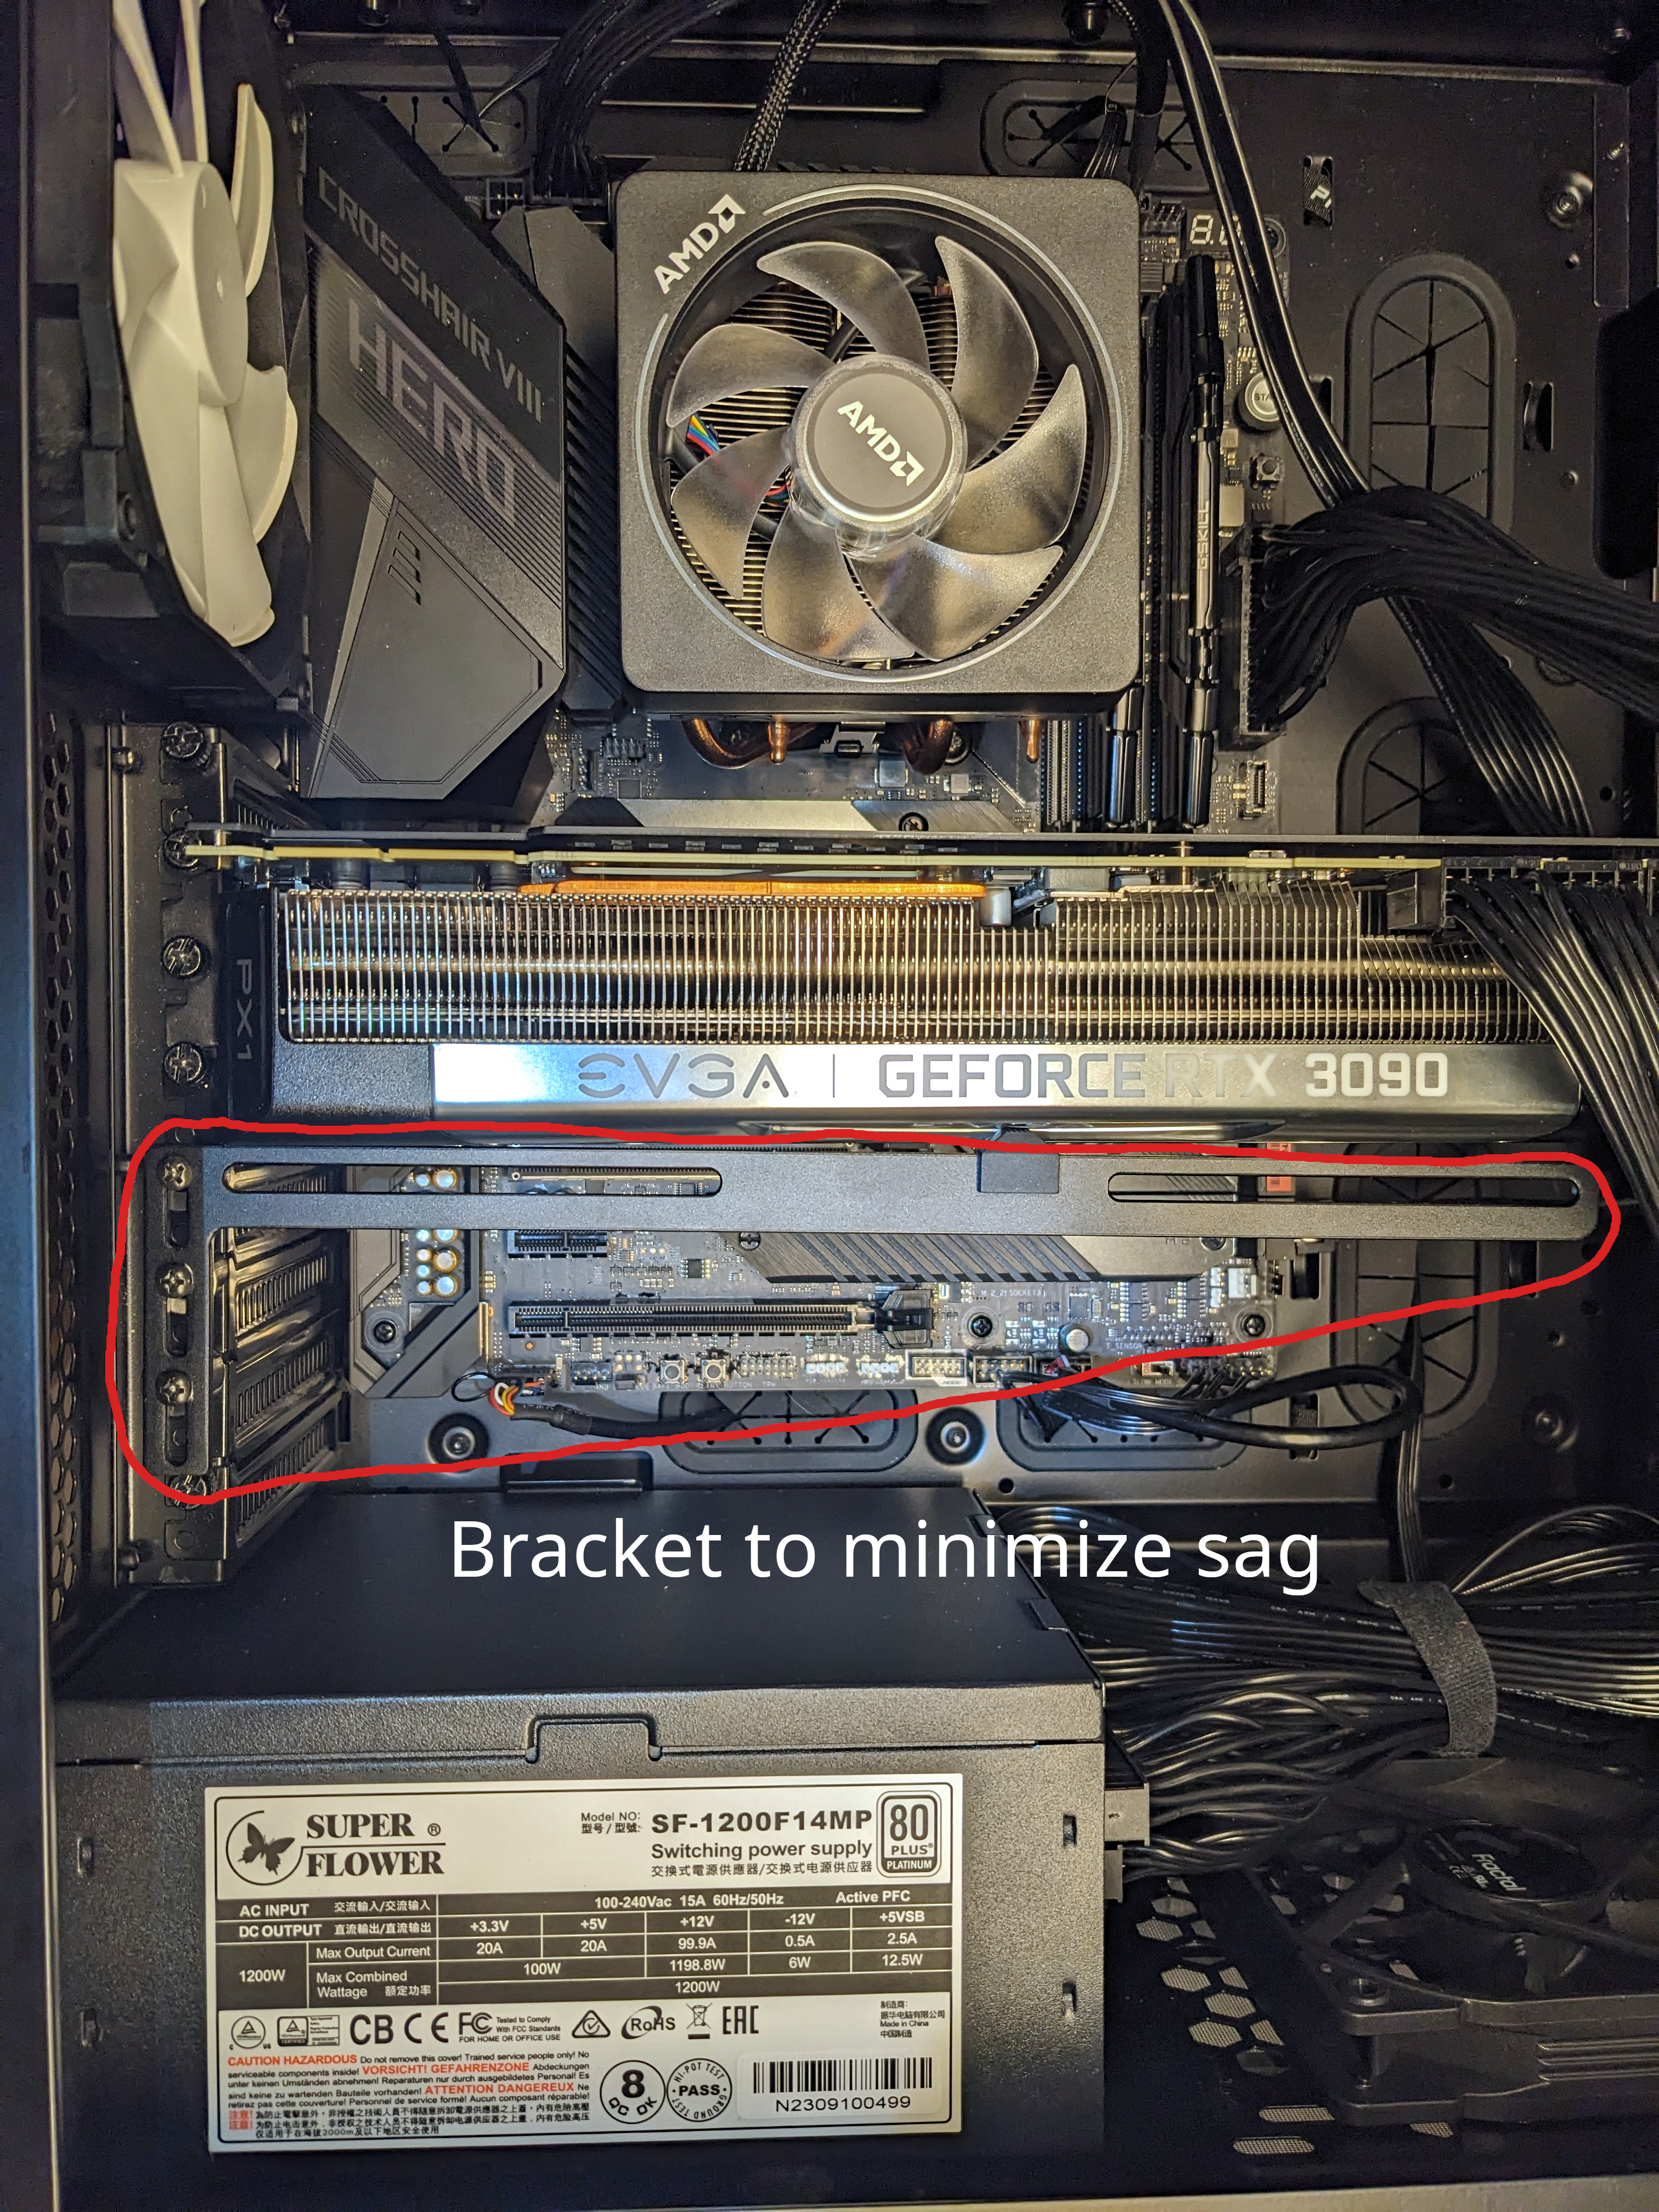
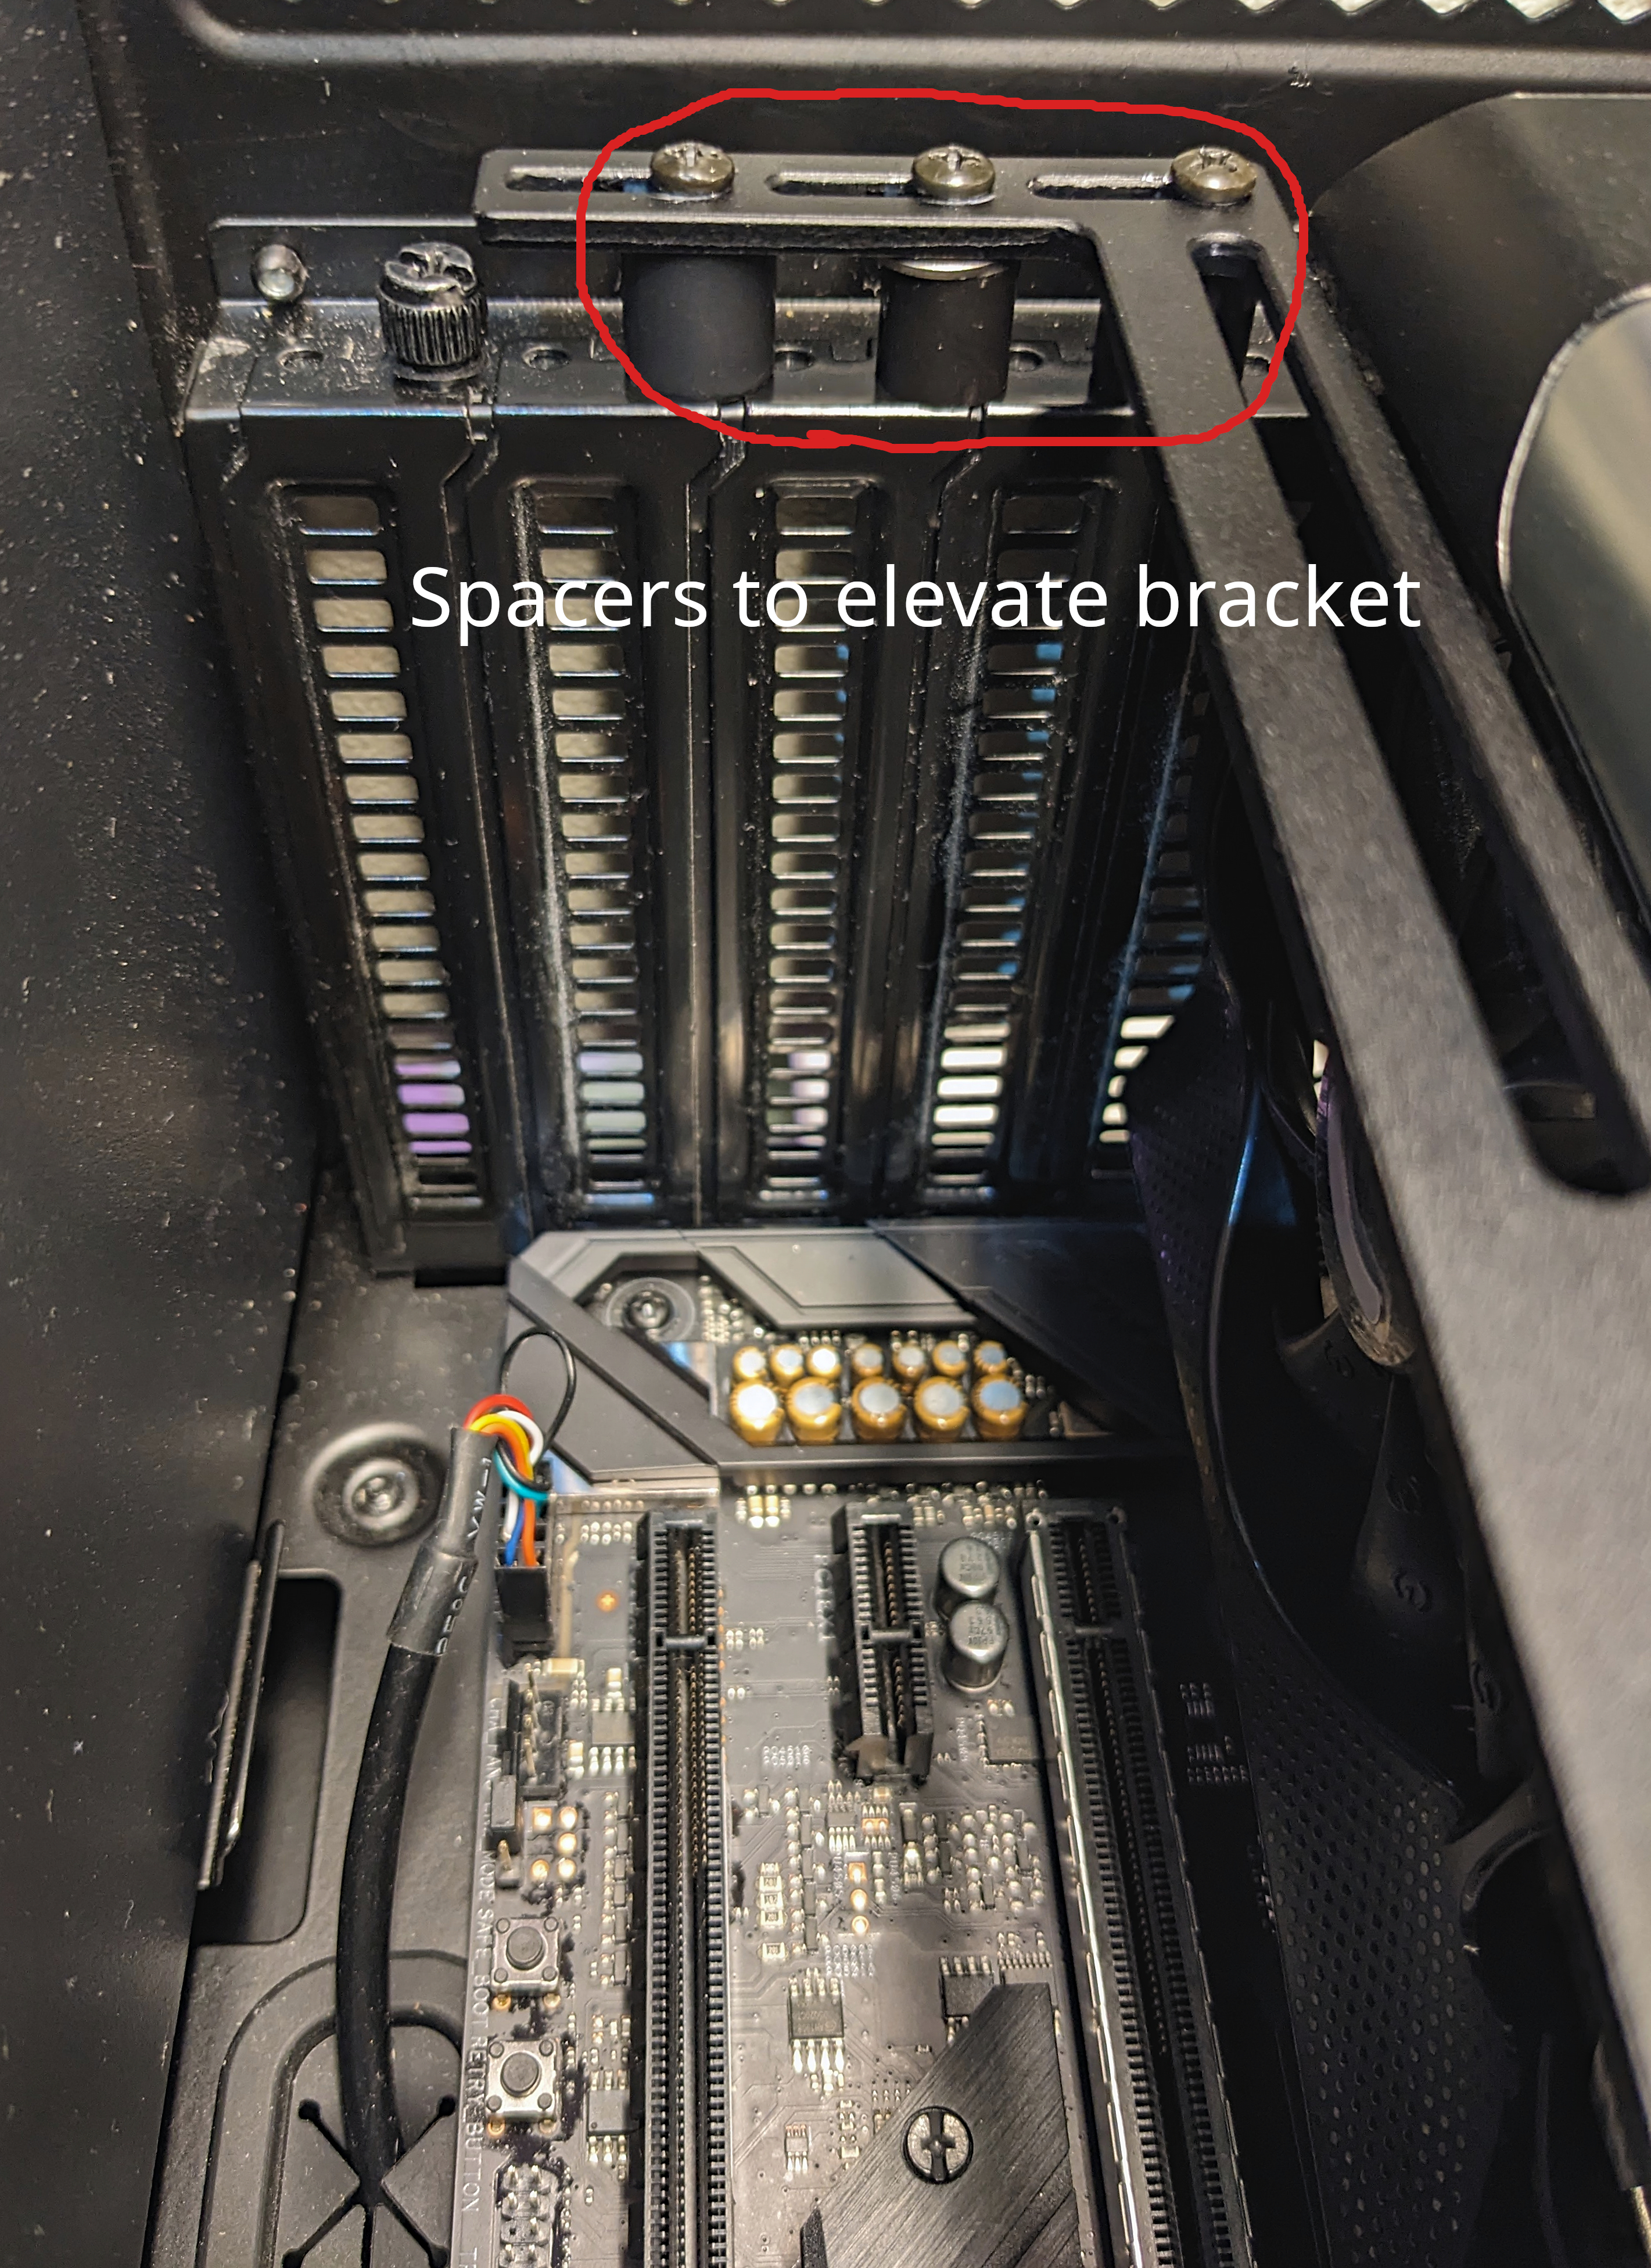
So I installed some plastic spacers I had laying around and flipped the bracket so there is no risk of the fans getting damaged.
Getting everything running
Finally I have the computer up and running! The final step before I can actually start running some models is to install the operating system and connect it to my network. I went with Ubuntu LTS Server, since everything just works with Ubuntu and I don’t need the most cutting edge Linux kernel or software compatibility. I also set-up my headless devices (like my home-lab) to auto log-in after shutdown/reboot.
I wrote a shell script that can be ran by copying the following code to a file named auto_login.sh and running sudo source ./auto_login.sh <user> for the given <user> (replace <user> with the default user). This was modified from advice on AskUbuntu. This script should work for any Linux system running systemd, but please verify before running.
#!/bin/bash

user=$1

cat>/etc/systemd/system/[email protected]<<EOL
[Service]
ExecStart=
ExecStart=-/sbin/agetty --noissue --autologin ${user} %I $TERM
Type=idle
EOL
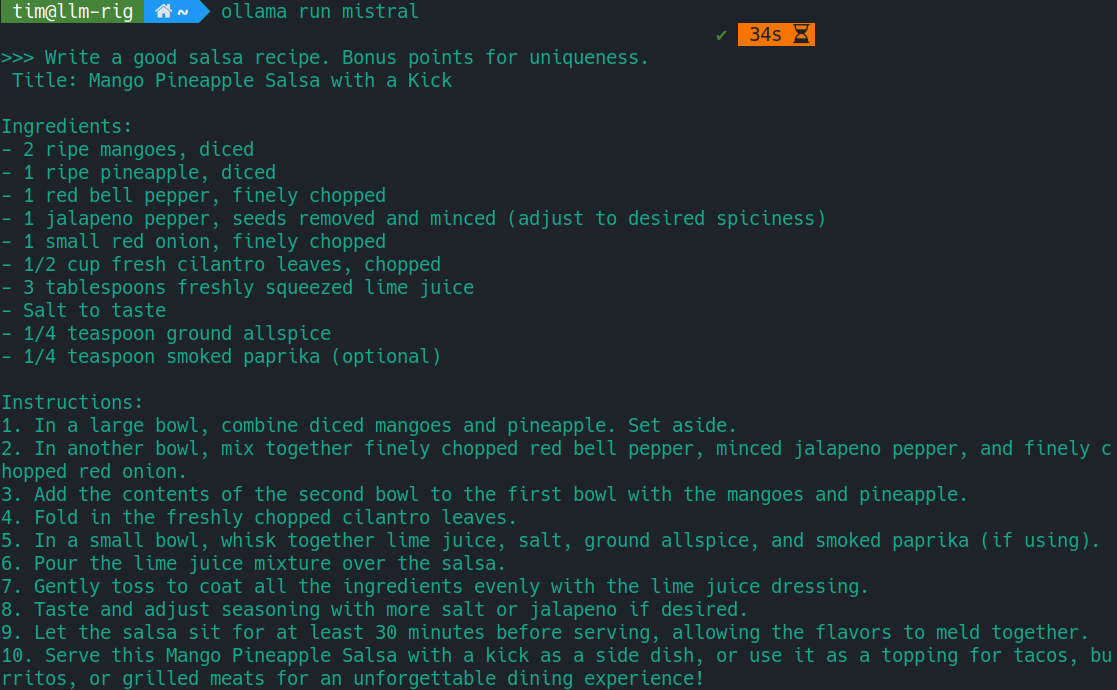
And finally here is a screen shot of running default Mistral 7B on ollama as a test (this finished in under a second, the 34 seconds refers to time between shell commands)!
